First to Witness: The New Virto Calendar and Its Fresh Features
Unveil the latest updates to Virto Calendar, featuring easier access to settings, enhanced SharePoint data management, and seamless meeting integrations. Dive into the details now.
Welcome to the guide on Virto Calendar’s latest update. This massive makeover simplifies your calendar management, allows for direct tweaks to SharePoint sources, and introduces new features to boost your efficiency. Get ready to discover how setting workdays, color-coding events, and integrating your favorite meeting platforms can transform your calendar time management with the Virto Calendar.
- Print out your calendar
- Quick start with templates
- Easy access to calendar settings
- Quick access to data source settings
- New workweek and workday settings
- Current time indicator
- Improved source visibility
- Color coding data sources and their categories
- Custom categories for Outlook calendar
- Join Teams, Zoom and Google meetings
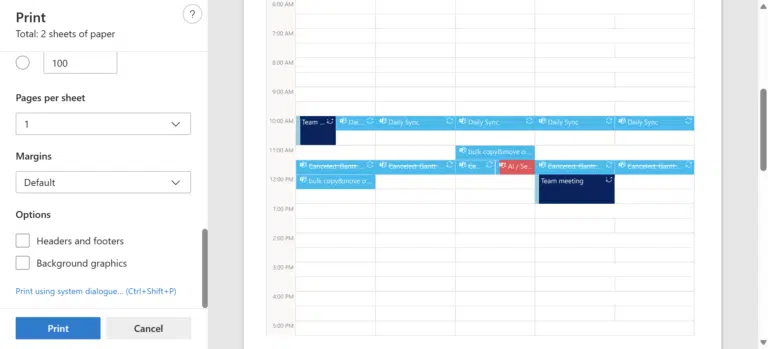
1. Now, you can print your calendar in any view you prefer.
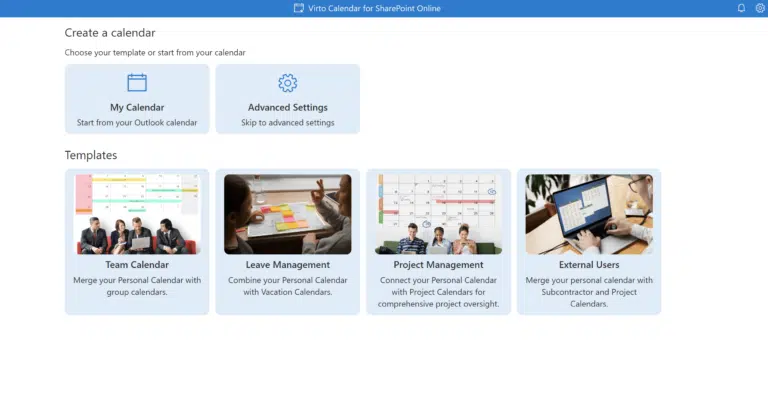
2. Enjoy our meticulously crafted templates to start your new calendar in seconds. More templates are on the way!
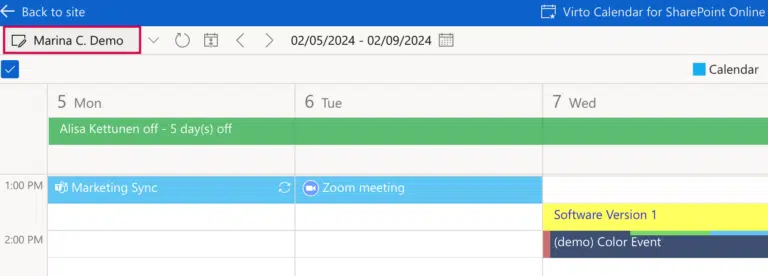
3. Now, you can access calendar settings without leaving the calendar view. Simply click the calendar name at the top left, and the settings window will open.
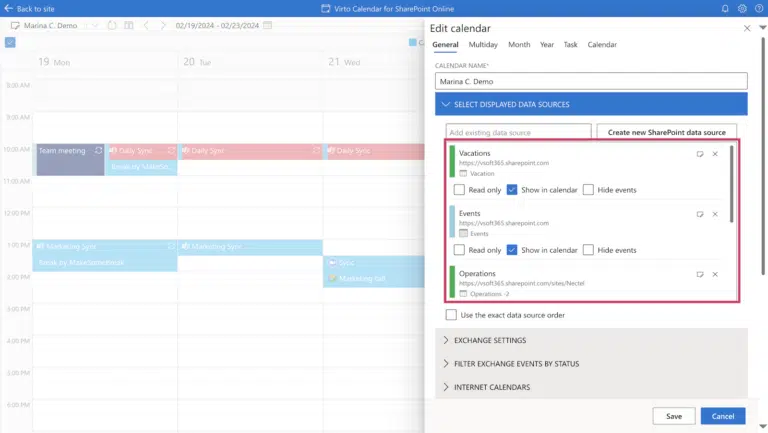
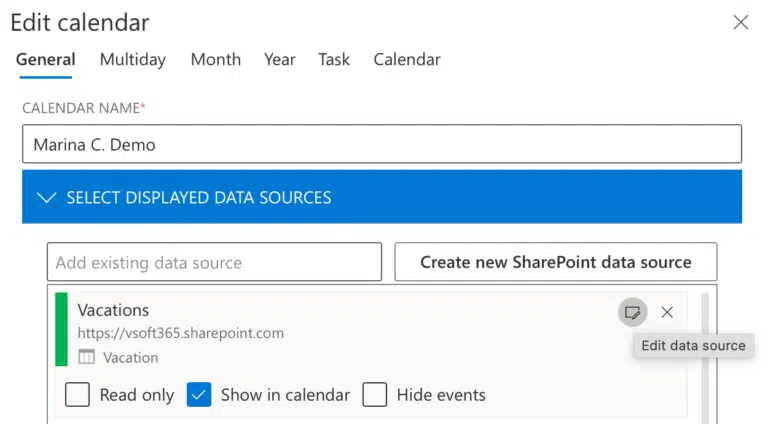
4. In the new version of Virto Calendar, you can add and modify displayed SharePoint data sources directly from this convenient interface. The tooltip for each data source displays information such as the calendar color, source link, name of the list, and options for toggling the visibility of the list’s events.
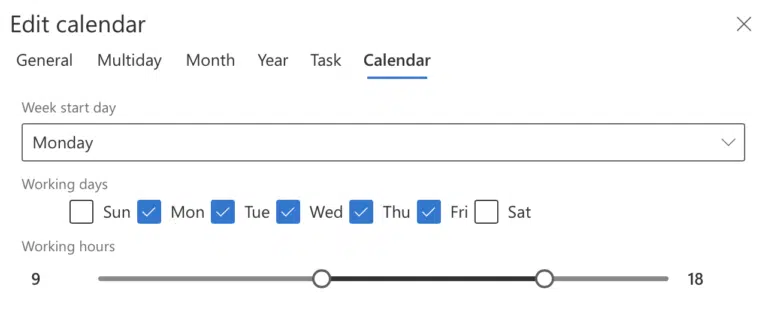
5. The new tab for calendar settings allows you to set working days, select the day the week starts on, and set the duration of the workday.
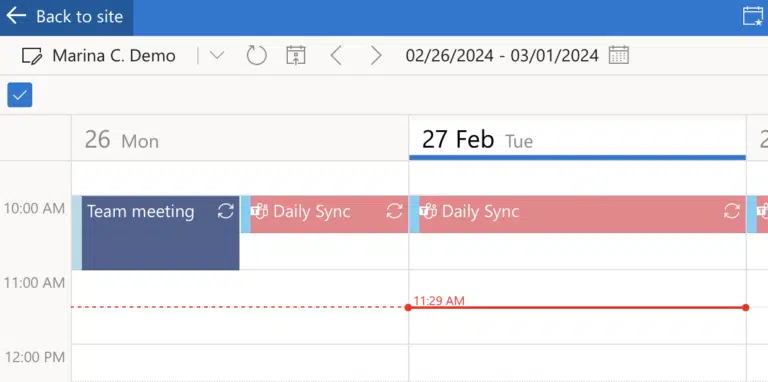
6. The red line in the calendar view indicates the current time, helping you navigate the current schedule more easily.
7. Each Exchange calendar now features its own source icon, allowing you to easily identify whether the calendar you wish to create an event in is Outlook or SharePoint.
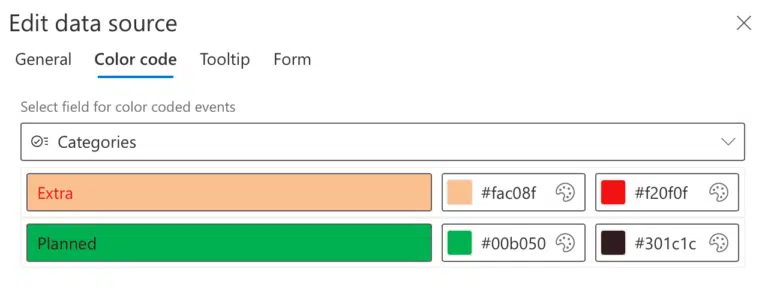
8. When adding or editing a SharePoint source as a calendar, you can assign colors to categories for SharePoint list events. To do this, click “Edit data source” and then navigate to the “Color code” tab.
Select the background and font colors for categories by clicking on the palette.
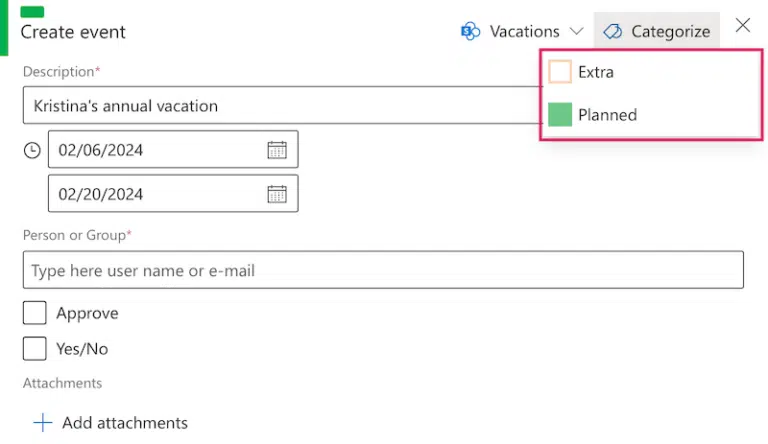
You will see these categories under the “Categorize” tab when creating an event in a calendar that has categories.
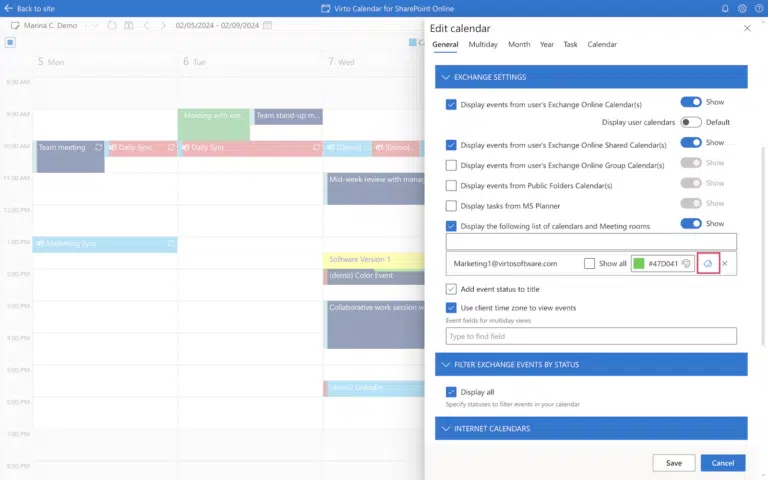
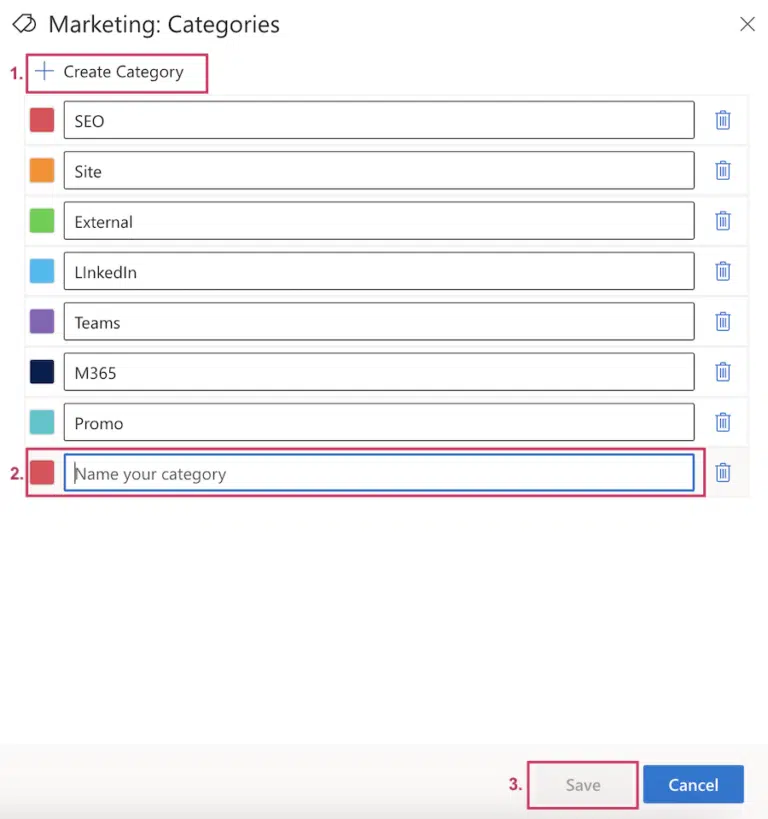
9. You can now create categories for Outlook calendars. First, add them in the “Exchange settings” tab. Then, click the category icon next to the added calendar.
In the window that opens, you can edit categories and their colors according to your preferences. Don’t forget to save your choice.
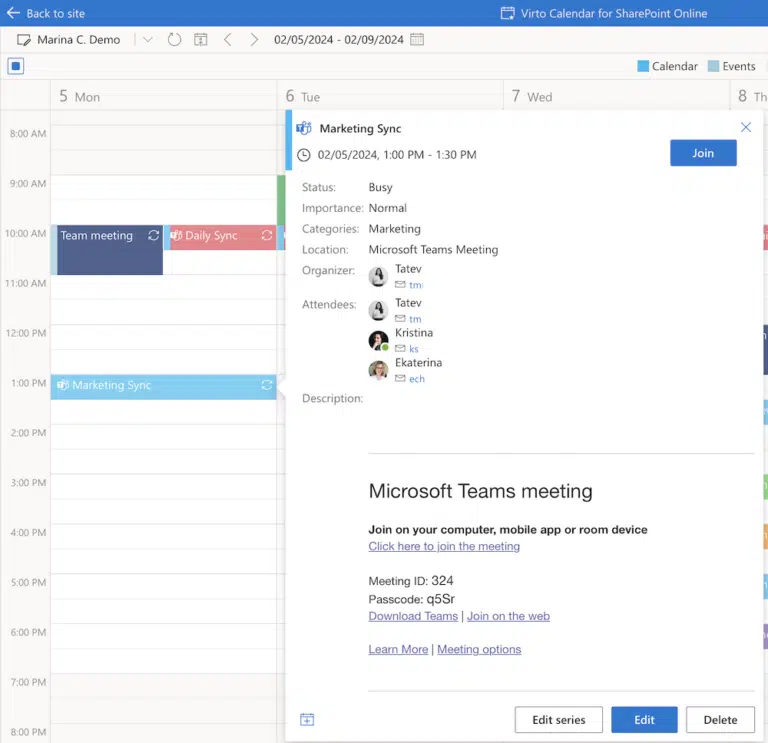
10. Previously, Virto Calendar users could join Teams meetings directly from the calendar.
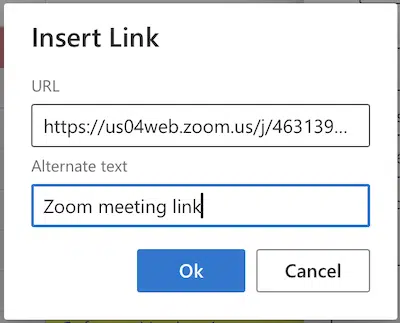
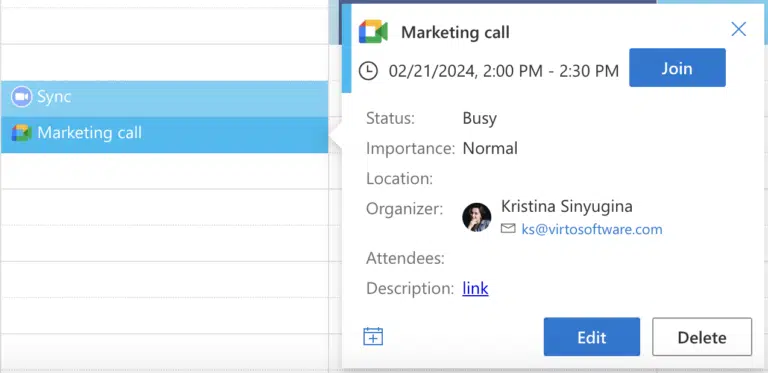
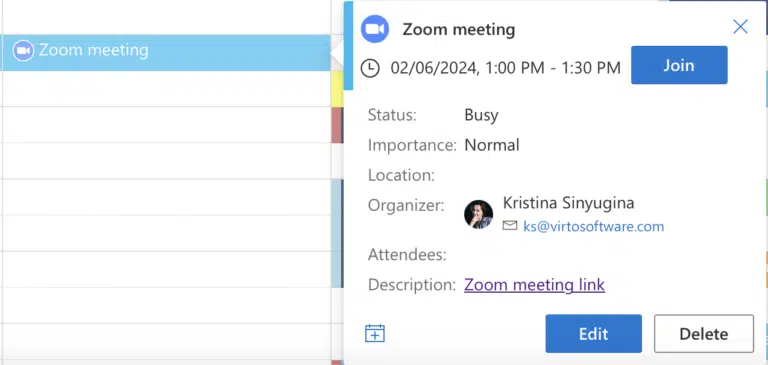
Now, users can also join Zoom and Google meetings. Virto Calendar will automatically assign a corresponding icon to your event. To do this, click “Insert link” when creating a Zoom or Google meeting.
Your event will then feature a “Join” button and an icon of the meeting platform next to the event name.
As we wrap up this exciting sneak peek into the Virto Calendar’s latest features, we hope you’re as thrilled as we are about the upcoming release. These updates are designed not just to simplify your scheduling but to add a layer of joy and efficiency to your daily planning.
Stay tuned for the official release date and get ready to experience a calendar view like never before. We’re committed to making your calendar time management seamless and enjoyable, so follow VirtoSoftware LinkedIn for more updates and tips on leveraging the new Virto Calendar to its fullest!


