Ever felt like your project is a juggling act, with too many balls in the air and not enough hands to catch them? That’s where resource leveling comes in—it’s the ultimate fix for chaotic schedules and overloaded teams. This project management technique helps you balance your resources—whether it’s people, tools, or time—so everything runs smoothly. By adjusting task timelines to match resource availability, you can avoid overworking your team, prevent bottlenecks, and keep your project moving forward without compromising quality. Ready to learn how to master this balancing act? Let’s dive in!
What Is Resource Leveling?
Resource leveling is like the ultimate balancing act for project managers. Imagine you’re managing a project, but your resources—whether it’s people, equipment, or time—are stretched thin or unevenly distributed. Resource leveling steps in to adjust start and finish dates, ensuring that tasks align with the availability of resources without overloading anyone. It’s all about creating harmony between demand and supply.
Think of it as a way to resolve scheduling conflicts, prevent employee burnout, and optimize productivity. Whether you’re dealing with tight deadlines or limited resources, resource leveling helps you allocate everything smartly so your project doesn’t spiral out of control.
Why is it important?
Here’s why resource leveling deserves your attention:
- Eliminates over-allocation: no more squeezing too much work out of too few resources. It ensures everyone has a manageable workload.
- Boosts productivity: by balancing workloads effectively, your team can focus on high-impact tasks without distractions.
- Reduces burnout: a well-leveled schedule keeps your team motivated and prevents exhaustion from overwork.
- Improves project feasibility: it helps create realistic timelines that align with available resources, making project plans more achievable.
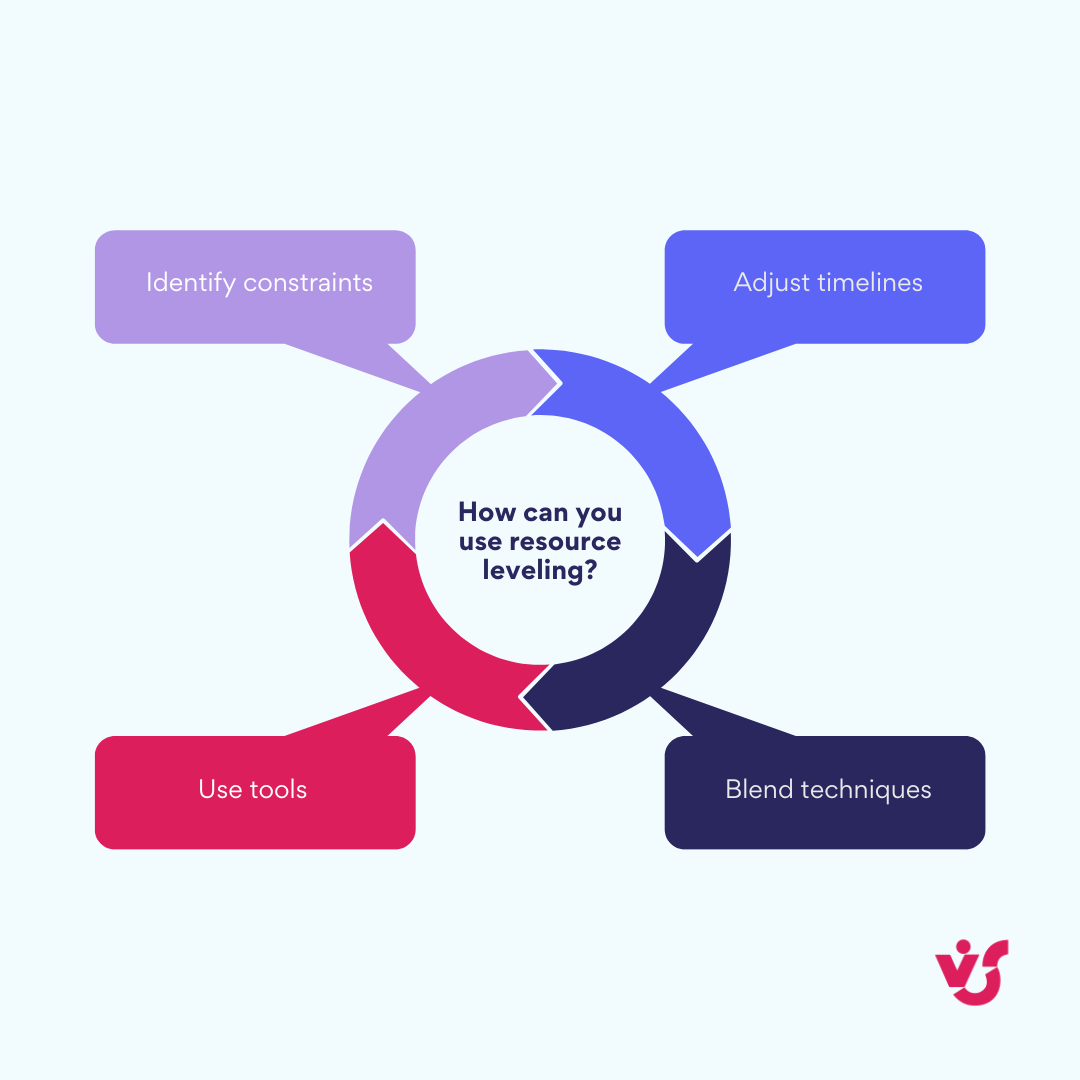
How can you use resource leveling?
Ready to put resource leveling into action? Here’s how:
- Identify constraints: pinpoint where resources are over-allocated or underutilized. This could be anything from overlapping schedules to limited equipment availability.
- Adjust timelines: extend or shift task start and end dates to match resource availability. This might mean delaying non-critical tasks to prioritize essential ones.
- Use tools: maximize project management software to automate adjustments and visualize resource allocation across multiple projects.
- Blend techniques: combine resource leveling with resource smoothing (when time is a fixed constraint) for maximum efficiency.
In this article, we’ll dive deeper into techniques for implementing resource leveling, share real-world examples, and explore tools that can make the process seamless. We’ll also touch on the key differences between resource allocation vs resource levelling, so you can apply the right approach for your team. Whether you’re managing a tech crew or handling complex projects with tight budgets, mastering resource leveling will set you up for success.
What Exactly is Resource Leveling?
Resource leveling is your go-to strategy for avoiding resource meltdowns. It’s the art of managing your team, tools, and time to eliminate overloads, balance workloads, and minimize idle hours. Think of it as reshuffling tasks, tweaking deadlines, or rejigging project timelines to ensure no one’s drowning in work while others are twiddling their thumbs.
The goal? To keep your project on track without blowing the budget or missing deadlines. By smoothing out resource spikes and dips, you’ll prevent burnout, reduce bottlenecks, and keep everyone humming along efficiently.
What is resource leveling in project management?
Here’s the playbook:
- Shift priorities: move non-urgent tasks to free up bandwidth for critical ones.
- Adjust deadlines: extend timelines for less time-sensitive work to match resource availability.
- Tweak task durations: shorten or stretch tasks to balance workloads without overcommitting your team.
While you can do this manually (hello, color-coded spreadsheets!), tools like Microsoft Project or Planner automate the heavy lifting. They flag over-allocated resources, suggest timeline adjustments, and let you visualize the impact of changes in real time.
Real-world wins: where resource leveling shines
IT teams: avoid developer burnout by redistributing coding sprints when QA testing runs behind schedule.
Construction: reschedule equipment rentals to avoid clashes between diggers, cranes, and crews on tight deadlines.
Marketing: balance designer workloads during a product launch by delaying lower-priority social media posts.
Manufacturing: optimize machine usage to reduce downtime and meet production quotas without overtime costs.
Results? Smoother workflows, happier teams, and projects delivered on time—without last-minute heroics.
👉🏻What is meant by resource leveling? It’s the process of tweaking task timelines, reallocating resources, or revising project schedules to prevent overloads and keep workloads balanced—ensuring projects stay on budget and deadline.
Resource leveling in project management
Resource leveling is like a Swiss Army knife for project managers—it’s versatile, practical, and can save the day when resources are tight. In project management, this technique comes into play when you’re working with limited resources or when tasks depend on one another.
For example:
- Tight resources: imagine you’re managing a project with only two developers, but three tasks need to be completed simultaneously. Resource leveling helps you adjust timelines so no one is overburdened.
- Task dependencies: let’s say Task B can’t start until Task A is finished. Resource leveling ensures that timelines align, avoiding idle time or bottlenecks.
Resource leveling and the PMP methodology
If you’re familiar with PMP (Project Management Professional) standards, you’ll know that resource leveling project management is a cornerstone of running projects effectively. It’s baked right into the methodology to help tackle common challenges like overloaded schedules and resource bottlenecks.
Here’s how it works within PMP:
- Time and resource management: adjust task schedules to match resource availability while keeping the project timeline realistic.
- Team balance: distribute workloads evenly across your team to avoid burnout and inefficiencies.
- Bottleneck busting: identify areas where resources are stretched too thin and redistribute tasks to keep things flowing smoothly.
By integrating resource leveling PMP into your approach, you’re not just managing a project—you’re setting it up for success by ensuring every stage runs like clockwork.
Resource leveling and the Critical Path
Let’s talk about the critical path—the sequence of tasks that directly impacts your project’s finish date. It’s the backbone of your schedule, and resource leveling plays a crucial role in keeping it intact.
Here’s how they work together:
- Impact on the critical path: resource leveling might adjust task start or end dates, which could shift the critical path slightly. The key is to make these changes without jeopardizing the overall timeline.
- Risk management: every adjustment carries risks—like delays or resource shortages—so it’s vital to monitor these closely and minimize disruptions to critical tasks.
By balancing resources while keeping an eye on the critical path, you can make sure your project stays on schedule without compromising quality or efficiency.
In short, project management resource leveling isn’t just a tool—it’s a strategy that helps you navigate the complexities of project management with confidence and clarity!
Explore Our Use Cases for Resource Leveling
Resource Leveling Techniques
Here is the breakdown of top techniques used to introduce resource leveling:
Task rebalancing: share the load
When your team’s workload looks like a rollercoaster, task rebalancing is your first move. Shift tasks between team members or adjust deadlines to even out the peaks.
Example: a software team has two developers—one swamped with bug fixes, the other waiting on QA results. Reassign some bugs to the second developer to balance the load.
When to use: ideal when you spot uneven workloads or idle team members.
Stretch deadlines: buy time without chaos
Sometimes, giving a task a little breathing room can save the day. Extend task durations to match resource availability and avoid burnout.
Example: A marketing team needs a designer for a campaign, but they’re already maxed out. Pushing the design deadline by two days prevents bottlenecks.
When to use: perfect for non-critical tasks with flexible timelines.
Buffer time: your safety net
Add buffer time between tasks to absorb delays or unexpected hiccups. It’s like having a Plan B baked into your schedule.
Example: a construction project schedules an extra day after each major phase (e.g., foundation work) to account for weather delays.
When to use: essential for high-risk projects or tasks with dependencies.
Prioritize ruthlessly: focus on what matters
Not all tasks are created equal. Rank tasks by priority to decide what can wait and what needs immediate attention.
Example: an IT team postpones a low-priority software update to focus on a critical server migration.
When to use: when deadlines are tight, or resources are extremely limited.

Real-world playbook: mix and match techniques
- Tech projects: use task rebalancing and prioritization during sprint planning to keep developers productive.
- Event planning: combine buffer time and stretched deadlines to handle vendor delays without derailing the schedule.
- Manufacturing: apply prioritization to allocate machines to high-demand product lines first, then shift to lower-priority orders.
👉🏻Pro tip: no single technique works alone—blend them like a project management cocktail to keep your resources balanced and your team sane!
Improve Your Resource Leveling with Virto Apps

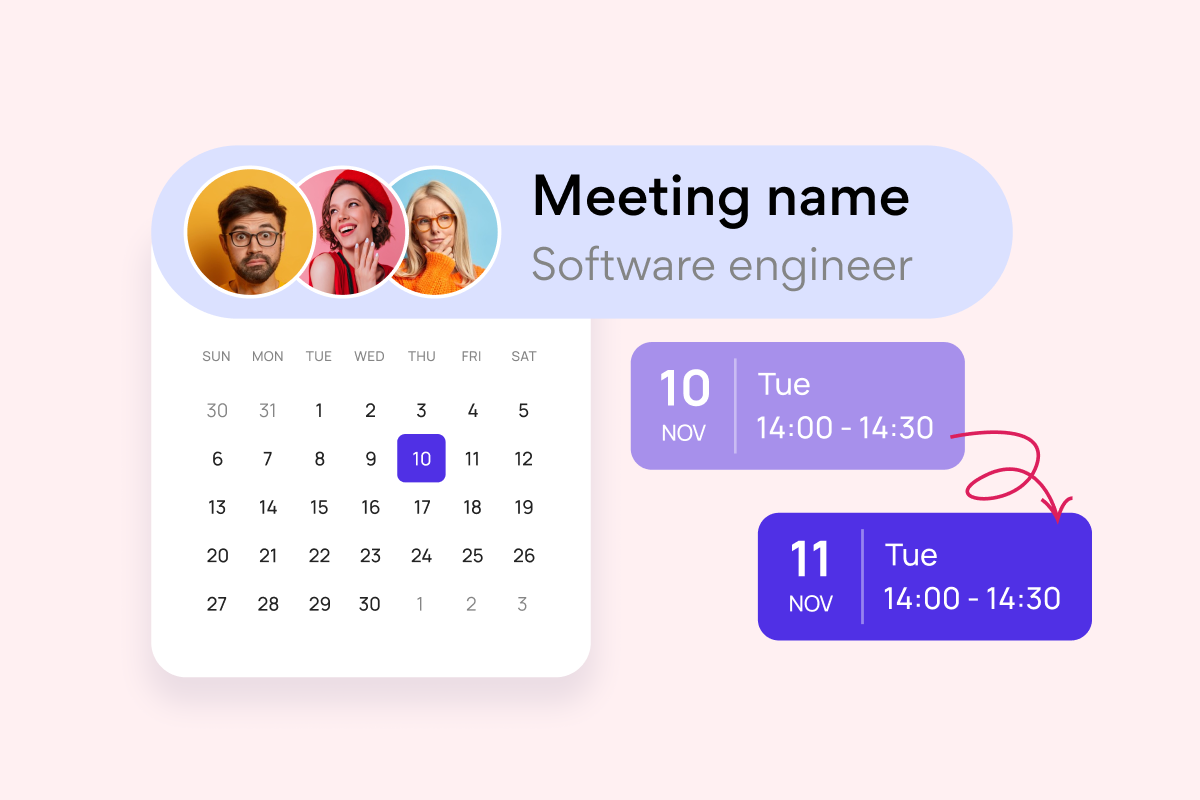
Virto Calendar App
Maximize efficiency with this calendar app, featuring comprehensive scheduling and customizable views.

Virto Calendar
Consolidate events from SharePoint, Exchange, Google, and more into one calendar view for simplified planning.

Virto Time Blocking
Improve time management with an app that schedules breaks and sends reminders for a balanced workday.
Resource Leveling vs. Resource Smoothing
Think of resource leveling and resource smoothing as two sides of the same coin—both aim to balance workloads, but they play by different rules.
| Resource leveling | Resource smoothing | |
| Goal | Eliminate resource overloads (no more 10-tasks-at-once chaos!). | Reduce workload fluctuations without touching the project deadline. |
| When to use | When your team is drowning in work—like a developer juggling three urgent tasks simultaneously. | When resources are unevenly used but not overloaded—like a designer with sporadic busy days. |
| Approach | Shift deadlines, extend task durations, or reallocate resources to spread the load evenly. | Tweak task assignments or adjust daily workloads within existing deadlines. |
| Result | Resources breathe easier, but project timelines might stretch. | Smoother resource usage, same finish date. |
➡️Pick resource leveling if: your team is overbooked, and deadlines are flexible.
Example: A construction project delayed by equipment shortages—extend timelines to avoid renting extra diggers.
➡️Pick resource smoothing if: deadlines are set in stone, but workloads are uneven.
Example: A marketing team needs to balance a designer’s workload during a product launch without pushing the launch date.
👉🏻What is the difference between resource leveling and smoothing? Resource leveling definition implies adjusting deadlines to eliminate overloads, potentially extending timelines. Resource smoothing balances workloads within fixed deadlines, keeping the project on schedule.
👉🏻Pro tip: use leveling when you’ve got wiggle room on time—and smoothing when the deadline’s non-negotiable. Your team (and sanity) will thank you!
👉🏻Learn more about resource smoothing in our article [link to new article]
The Upsides and Challenges of Resource Leveling
Resource leveling isn’t just a fancy term—it’s your secret weapon for running projects like a pro. Here are the benefits of resource leveling:
✅Better results: resources are used smarter, not harder, so quality stays high.
✅No more burnout: your team won’t feel like they’re running a marathon at sprint speed.
✅Sharper planning: predictable timelines mean fewer “Oops, we’re behind!” moments.
✅Deadline zen: tasks finish when they should, not when they can.
✅Budget love: cut wasted time and resources—your CFO will high-five you.
✅Team mojo: less stress + fewer idle hours = happier, more productive squads.

The tricky bits: challenges to watch
Here’s where resource leveling can trip you up:
- Schedule slips: balancing workloads might push deadlines further out than planned.
- Time guessing gone wrong: misjudge task durations? Suddenly, your buffer time vanishes.
- Coordination chaos: constantly shifting timelines can leave teams dizzy (“Wait, are we doing Task A or B now?”).
👉🏻Pro tip: tackle these challenges head-on by using project management tools (like MS Project or Asana) to track changes in real time and keep everyone looped in. The smoother the communication, the fewer the headaches!
Mastering Resource Leveling: Tips, Tools, and Metrics
Tools like Microsoft Project (and others like Asana or ClickUp) are your secret sauce for efficient resource leveling. Here’s how they help:
Auto-optimize schedules: these tools flag overbooked resources, suggest deadline adjustments, and even split tasks to balance workloads—no manual guesswork needed.
Sync with other tasks: link resource leveling to dependencies, budgets, and team calendars to keep everything in harmony. For example, delaying a design task in MS Project automatically pushes dependent development tasks, avoiding bottlenecks.
Real-time adjustments: sync changes across your project so everyone stays updated—no more “I didn’t know the deadline moved!”
Pro tips to dodge pitfalls
Resource leveling isn’t a “set it and forget it” deal. Stay sharp with these hacks:
1️⃣Plan like a pro:
- Map the Critical Path: know which tasks can’t budge—and which can.
- Build buffers: add 10–15% extra time to high-risk tasks to absorb surprises.
2️⃣Review relentlessly:
- Weekly check-ins: spot resource clashes early and adjust before they snowball.
- Use dashboards: tools like ProjectManager track workloads in real time, so you can rebalance with a click.
3️⃣Go agile:
- Sprint planning: break projects into 2-week chunks to reassign resources flexibly.
- Retrospectives: ask your team, “What’s burning you out?” and tweak allocations fast.
4️⃣Talk it out:
- Daily standups: sync on workloads—“Who’s swamped? Who can help?”
- Transparency wins: share resource charts so everyone sees the big picture.
How to measure success
Don’t just wing it—track these metrics to see if your leveling actually works:
- Resource utilization rate: aim for 70–80% to avoid burnout or idle time.
- Critical Path duration: if leveling adds days here, rethink priorities.
- Task redistribution rate: high numbers? Your initial planning might need work.
- Schedule variance (SV): negative SV? Leveling isn’t keeping pace with delays.
- Overtime rate: dropping? Good—your team’s not overworked.
- Team satisfaction: survey your squad. Happy team = effective leveling.

Bottom Line: resource leveling isn’t magic—it’s a mix of smart tools, constant tweaks, and listening to your team. Nail this, and you’ll turn resource chaos into a well-oiled machine.
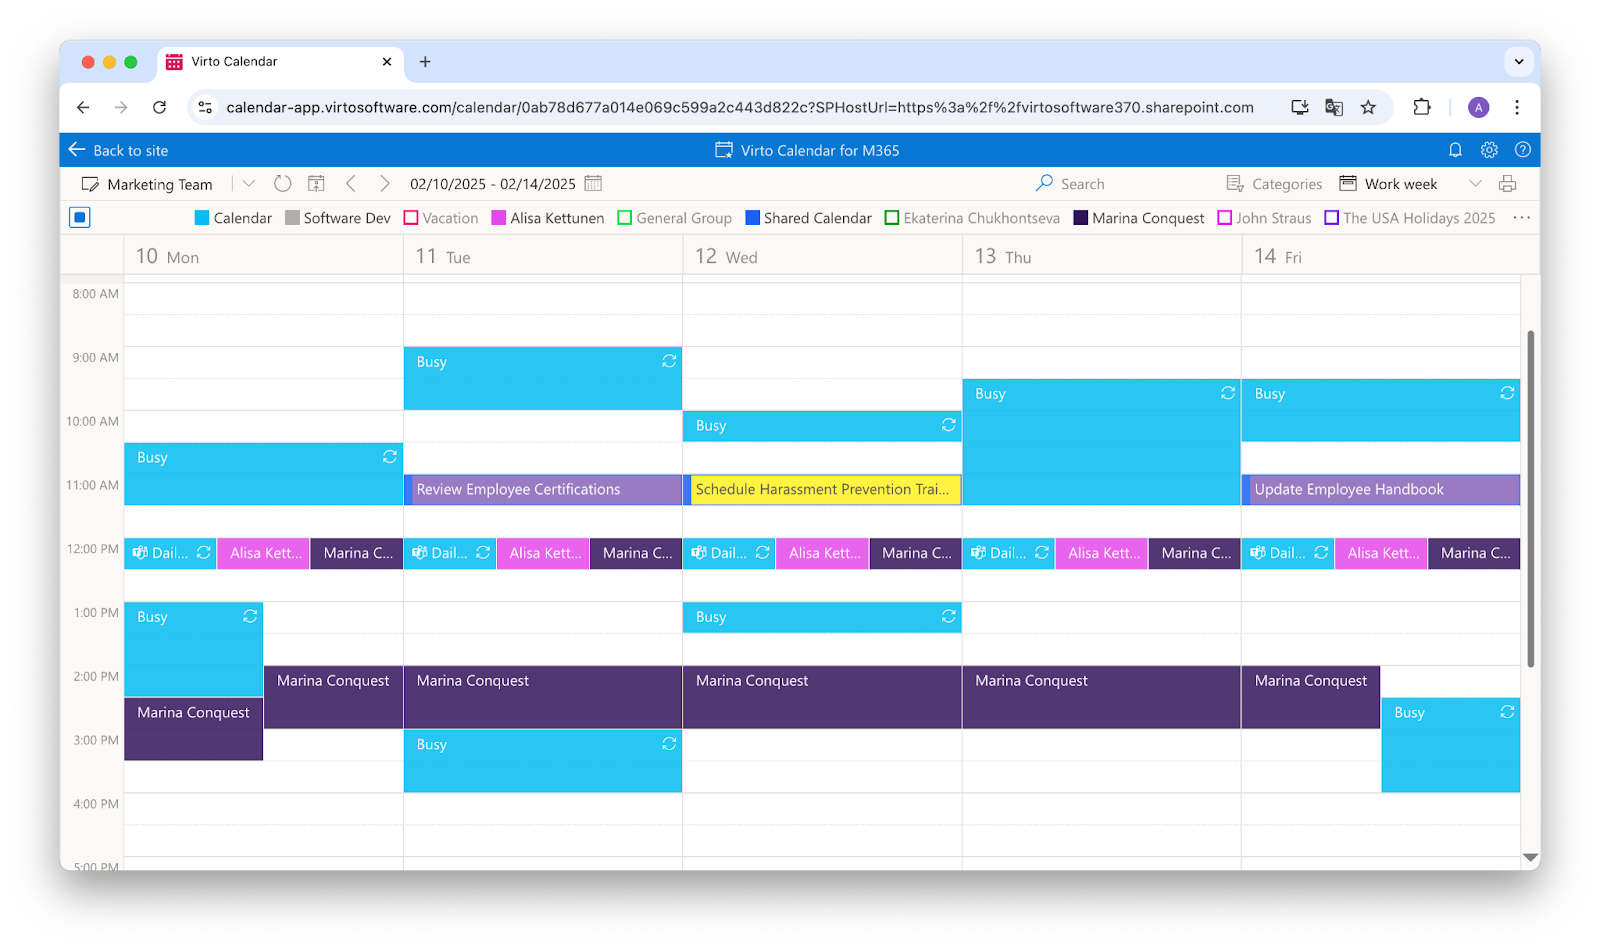
How VirtoSoftware Calendar Supports Resource Leveling
VirtoSoftware Calendar is like the ultimate assistant for project managers—it simplifies resource leveling with powerful tools designed to optimize schedules and workloads. Here’s how it works:
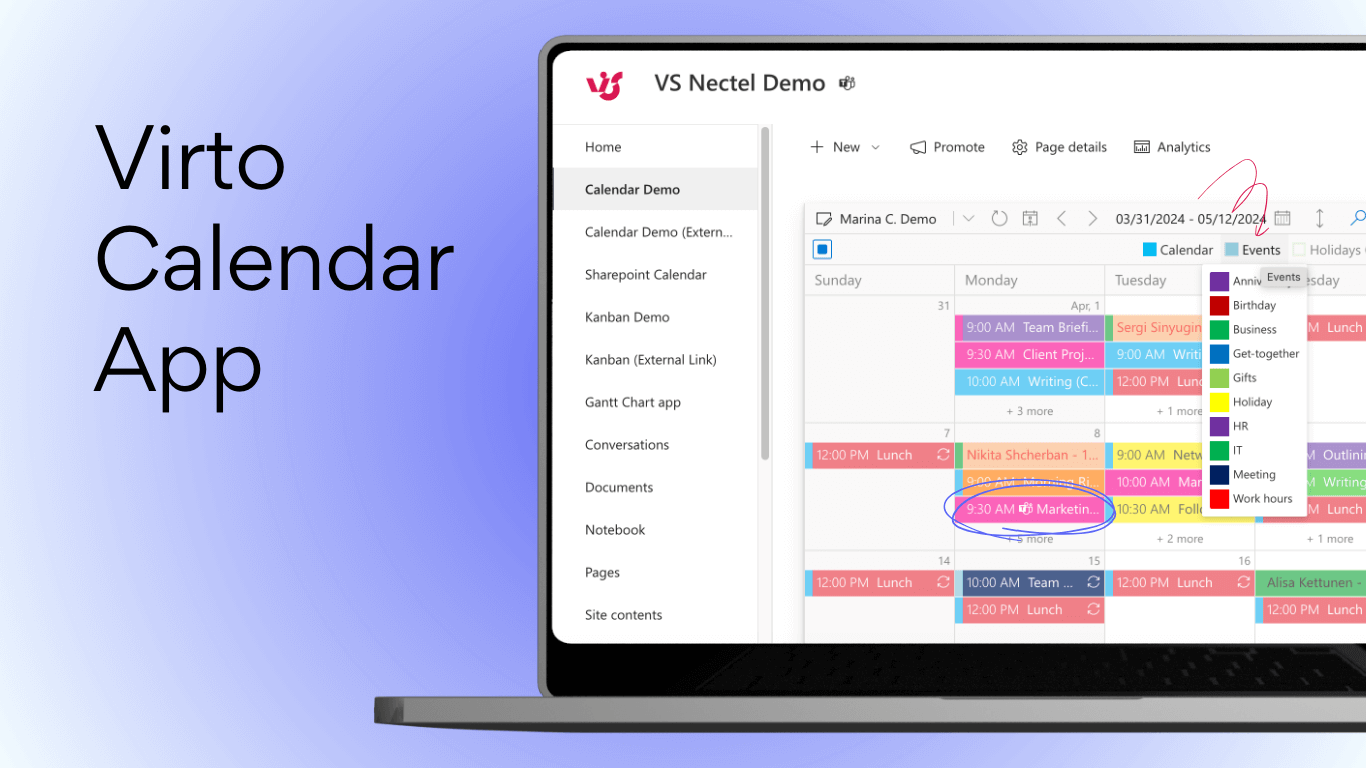
1️⃣Centralized scheduling
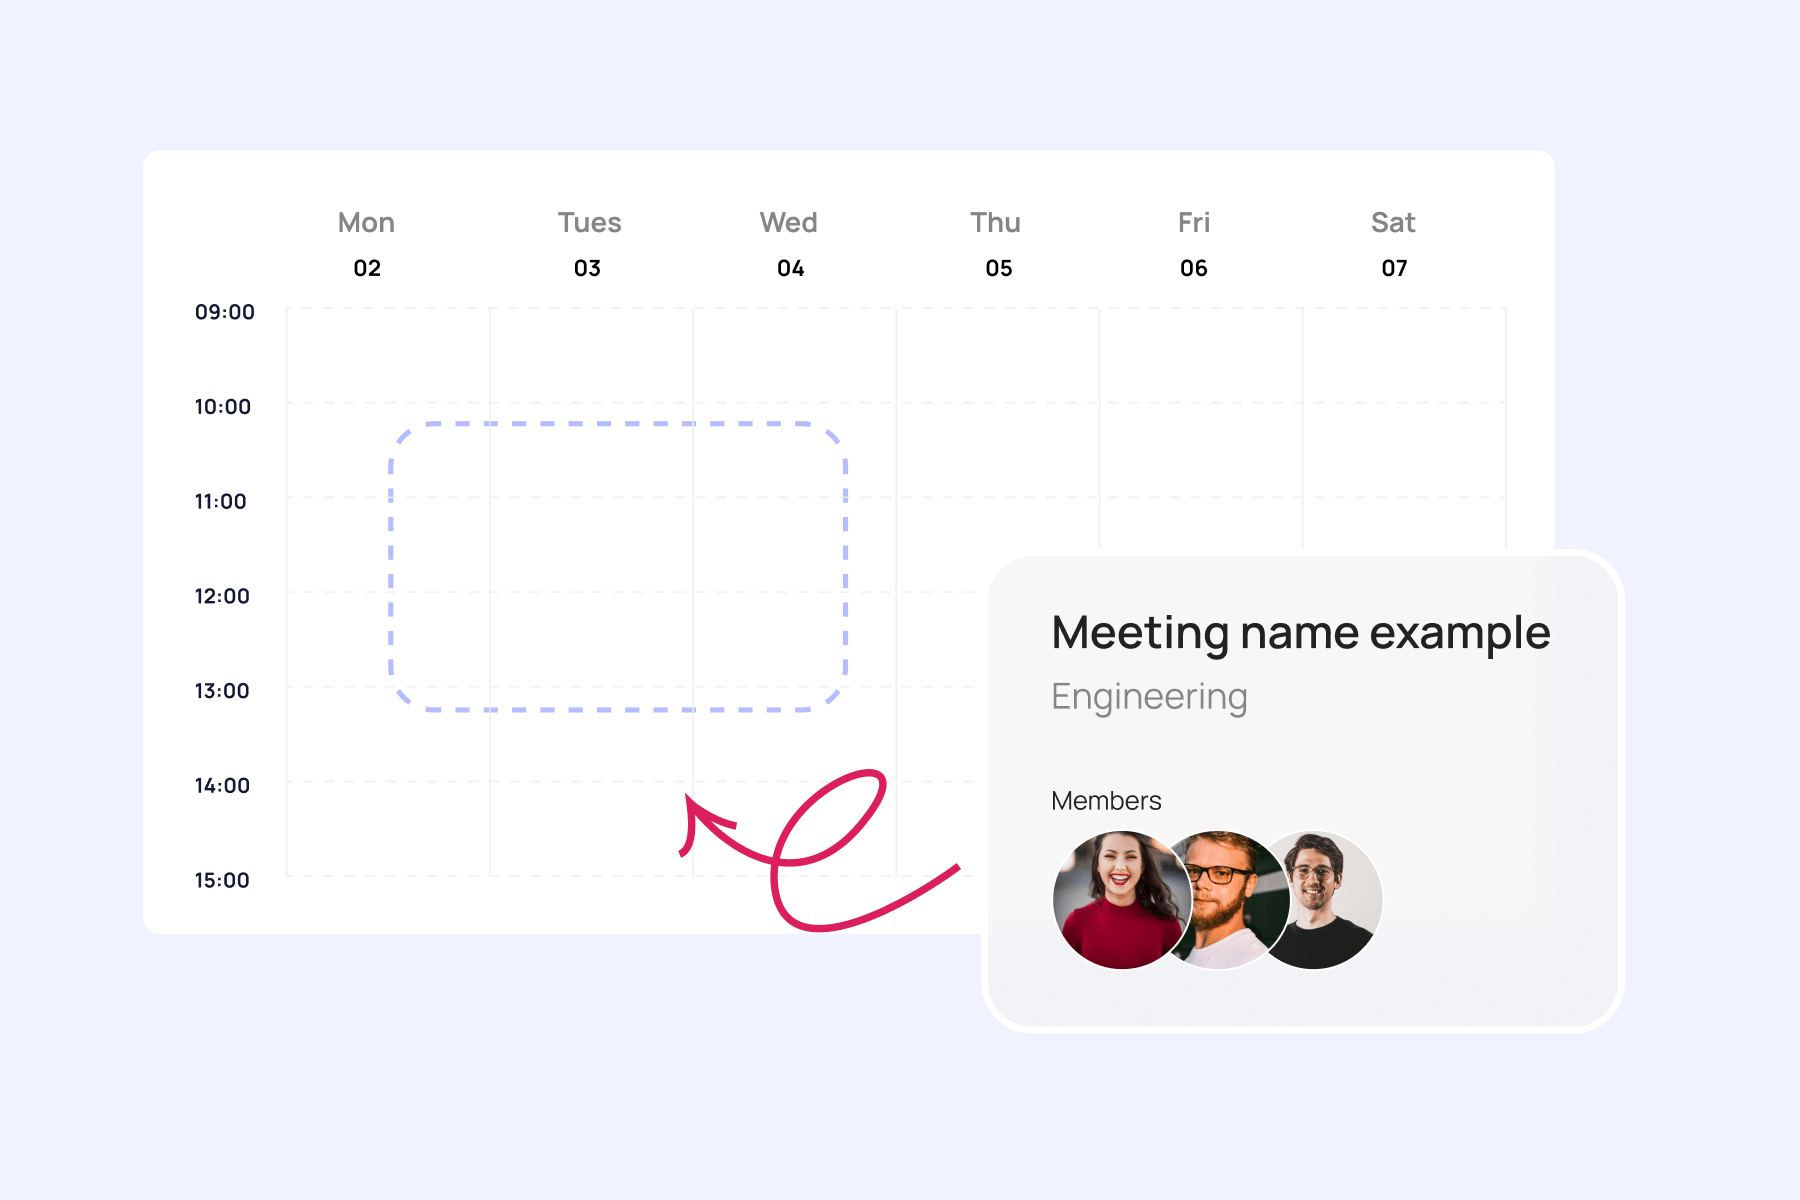
Virto Calendar brings all tasks and employee schedules into one unified view, helping you spot overloads or idle time at a glance.
✔️Example: A manager can see that two team members are overwhelmed while others have free capacity. Tasks can be reassigned directly within the calendar to balance workloads effectively.
2️⃣Resource availability visualization
The calendar integrates seamlessly with platforms like Outlook, Microsoft Teams, and SharePoint, showing who’s available and who’s booked.
✔️Use case: perfect for planning shifts, meetings, or project timelines without accidentally double-booking resources.
3️⃣Automatic reminders and notifications
Never miss a beat—Virto sends alerts to avoid scheduling conflicts and ensures everyone stays updated on changes.

✔️Benefit: both managers and employees can respond quickly to adjustments, keeping projects on track.
4️⃣Customizable views and categories
Use color codes, filters, and categories to visualize workloads clearly.
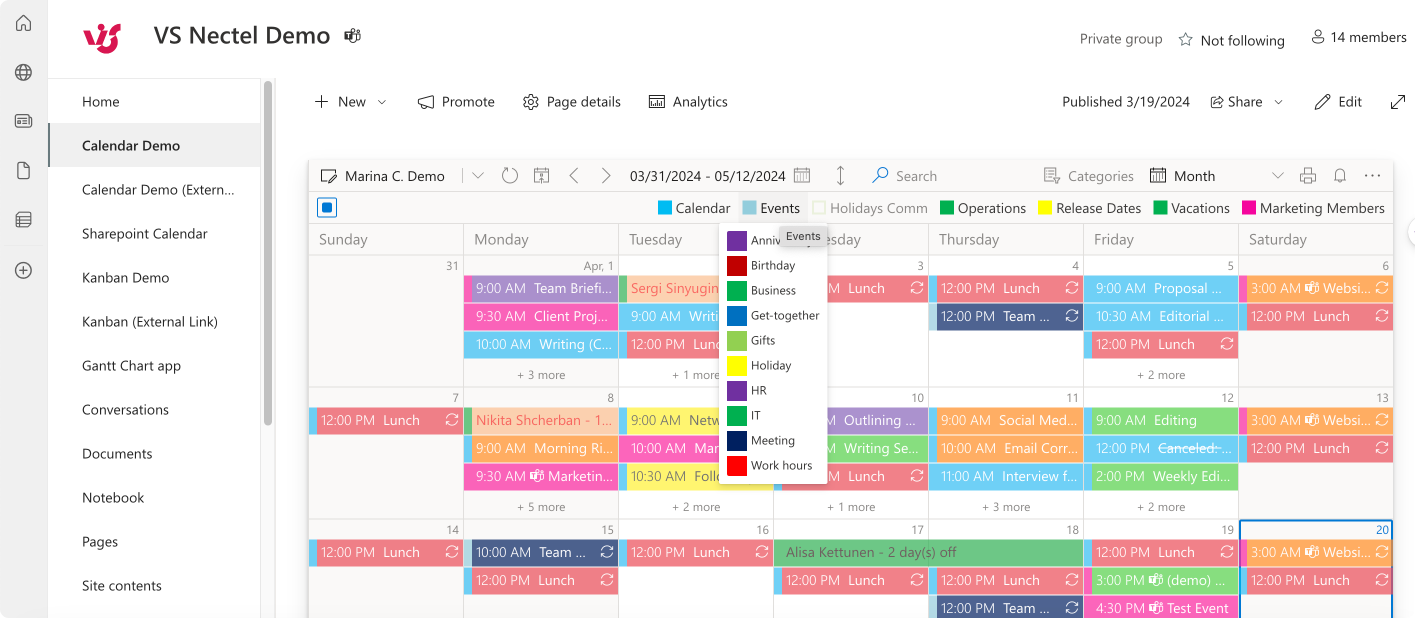
✔️Pro tip: integrate Virto Calendar with Virto Kanban Board for real-time task management alongside resource scheduling.
5️⃣Optimized shift allocation
The calendar can automatically suggest the best time slots for tasks based on resource availability.
✔️Example: Need to schedule a team meeting? Virto finds the perfect window where everyone is free—no back-and-forth emails required!
6️⃣Microsoft 365 Integration
If your team already uses Microsoft tools, Virto Calendar fits right in, speeding up your existing workflows without extra hassle.

How to use VirtoSoftware Calendar for efficient resource leveling
Here’s a step-by-step guide to integrate VirtoSoftware Calendar for resource leveling:
Step 1: Set up your calendar
Import schedules from Outlook, SharePoint, or other sources into one centralized view.
Step 2: Analyze workloads
Use visual tools like color coding to identify overloaded or underutilized resources instantly.
Step 3: Reassign tasks
Drag and drop tasks between team members directly in the calendar interface to balance workloads efficiently.
Step 4: Automate adjustments
Enable notifications and reminders to keep everyone aligned with the updated schedule.
Step 5: Integrate tool
Connect with Microsoft Teams, SharePoint, or Kanban boards for seamless coordination across platforms.

Real-life example
Imagine you’re managing a project with five employees, but two of them are drowning in tasks while the others have lighter schedules. Virto Calendar highlights this imbalance visually in its centralized view, allowing you to reassign tasks in minutes—no spreadsheets or guesswork required! Plus, its integration with Outlook ensures that everyone gets notified about the changes instantly.
Why it works
VirtoSoftware Calendar doesn’t just simplify scheduling—it transforms resource leveling into a streamlined process that saves time, reduces stress, and keeps projects running smoothly across teams and platforms.
Conclusion: The Resource Leveling Edge
Resource leveling isn’t just a nice-to-have—it’s your shield against team burnout and project chaos. By balancing workloads and smoothing out bottlenecks, you’ll keep deadlines realistic, budgets intact, and your team firing on all cylinders.
Tools like VirtoSoftware Calendar make this a breeze with centralized scheduling, real-time updates, and seamless Microsoft integration.
Try Virto—turn resource juggling into a well-oiled workflow. Your team (and sanity) will thank you. Explore Virto Calendar App for Microsoft Teams or check out it’s version for SharePoint Online & Microsoft 365 to find the perfect fit for your team.
👉🏻If this article resonated with you, check out our other deep dive on project scheduling strategies—it ties in perfectly.